Five Styles of Christmas: Modern Eclectic Holiday Decor Tour

Happy Friday and 9 days til Christmas!  I am excited to share Part II of our Holiday Tour with you!  Last week, I shared the first part of our tour which focused on our main living spaces.  At this time, our holiday decor is limited to our a portion of our first floor.  As our family (hopefully) grows, I may extend this into bedrooms and also decorate spaces that have currently not been renovated.  If a room is not renovated yet....it doesn't get any love!

Today I am excited to share with you our entry, kitchen, and a touch of holiday in our powder room.  I have also taken some nighttime shots of the living/dining room which shows holiday decor at night with the the magic of Christmas lights!

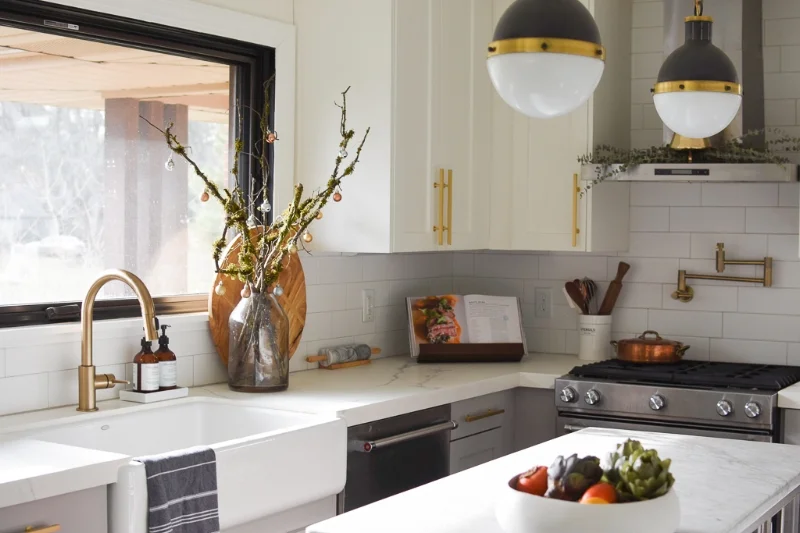
I have not really shared many pictures of our kitchen yet.  There are still some finishing touches that need to be completed but I thought I would share the current situation.

The Christmas touches in our kitchen are simple.  A couple of wreaths have been added to bring in some beautiful greenery into a very white room.  

Our cactus (yes, it's real) has been wrapped in twinkle lights and topped up with some playful reindeer antlers.  

More fresh eucalyptus dresses our vent hood and a different variety serves as a simple centerpiece for our breakfast nook.  

The branches by our sink are foraged from the PNW.  This is a place close to my heart as we were married on Cannon Beach and I fell in love with the PNW during my honeymoon.  

DSC_1152.jpg
DSC_1137.jpg
DSC_1129.jpg
DSC_1131.jpg
DSC_1132.jpg
DSC_1135.jpg
DSC_1118.jpg
DSC_1124.jpg
DSC_1142.jpg

Unfortunately, I do not have the proper camera equipment to photograph small spaces (Ohhhhh Rebecca!!! :) ).  I have a total of one powder room bath picture that I was able to photograph.  I kept it super simple in the bathroom and added fresh eucalyptus in lieu of the usual rose.


DSC_1164.jpg

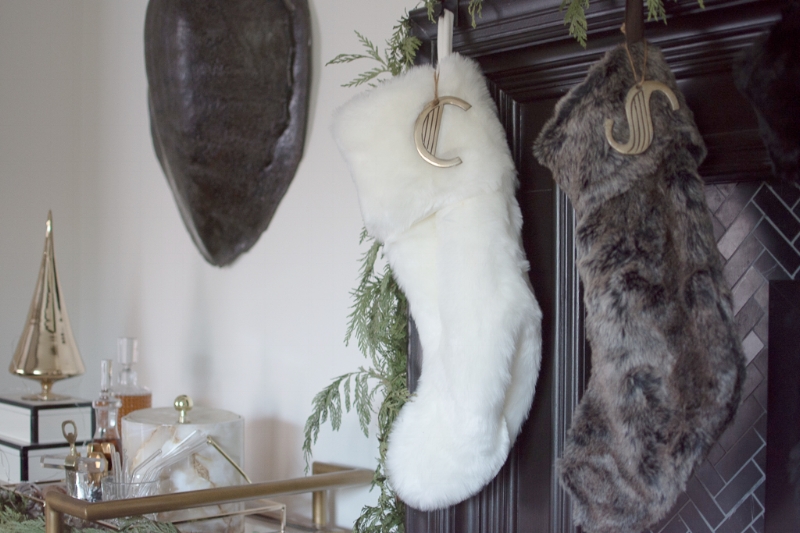
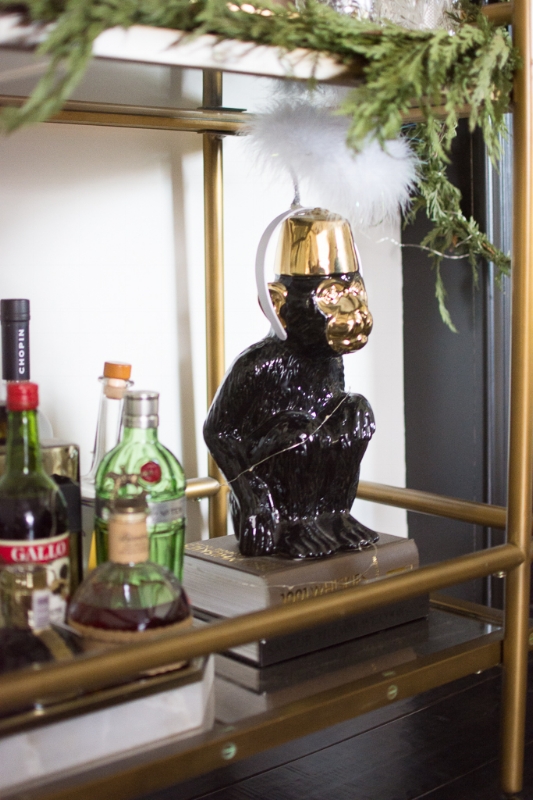
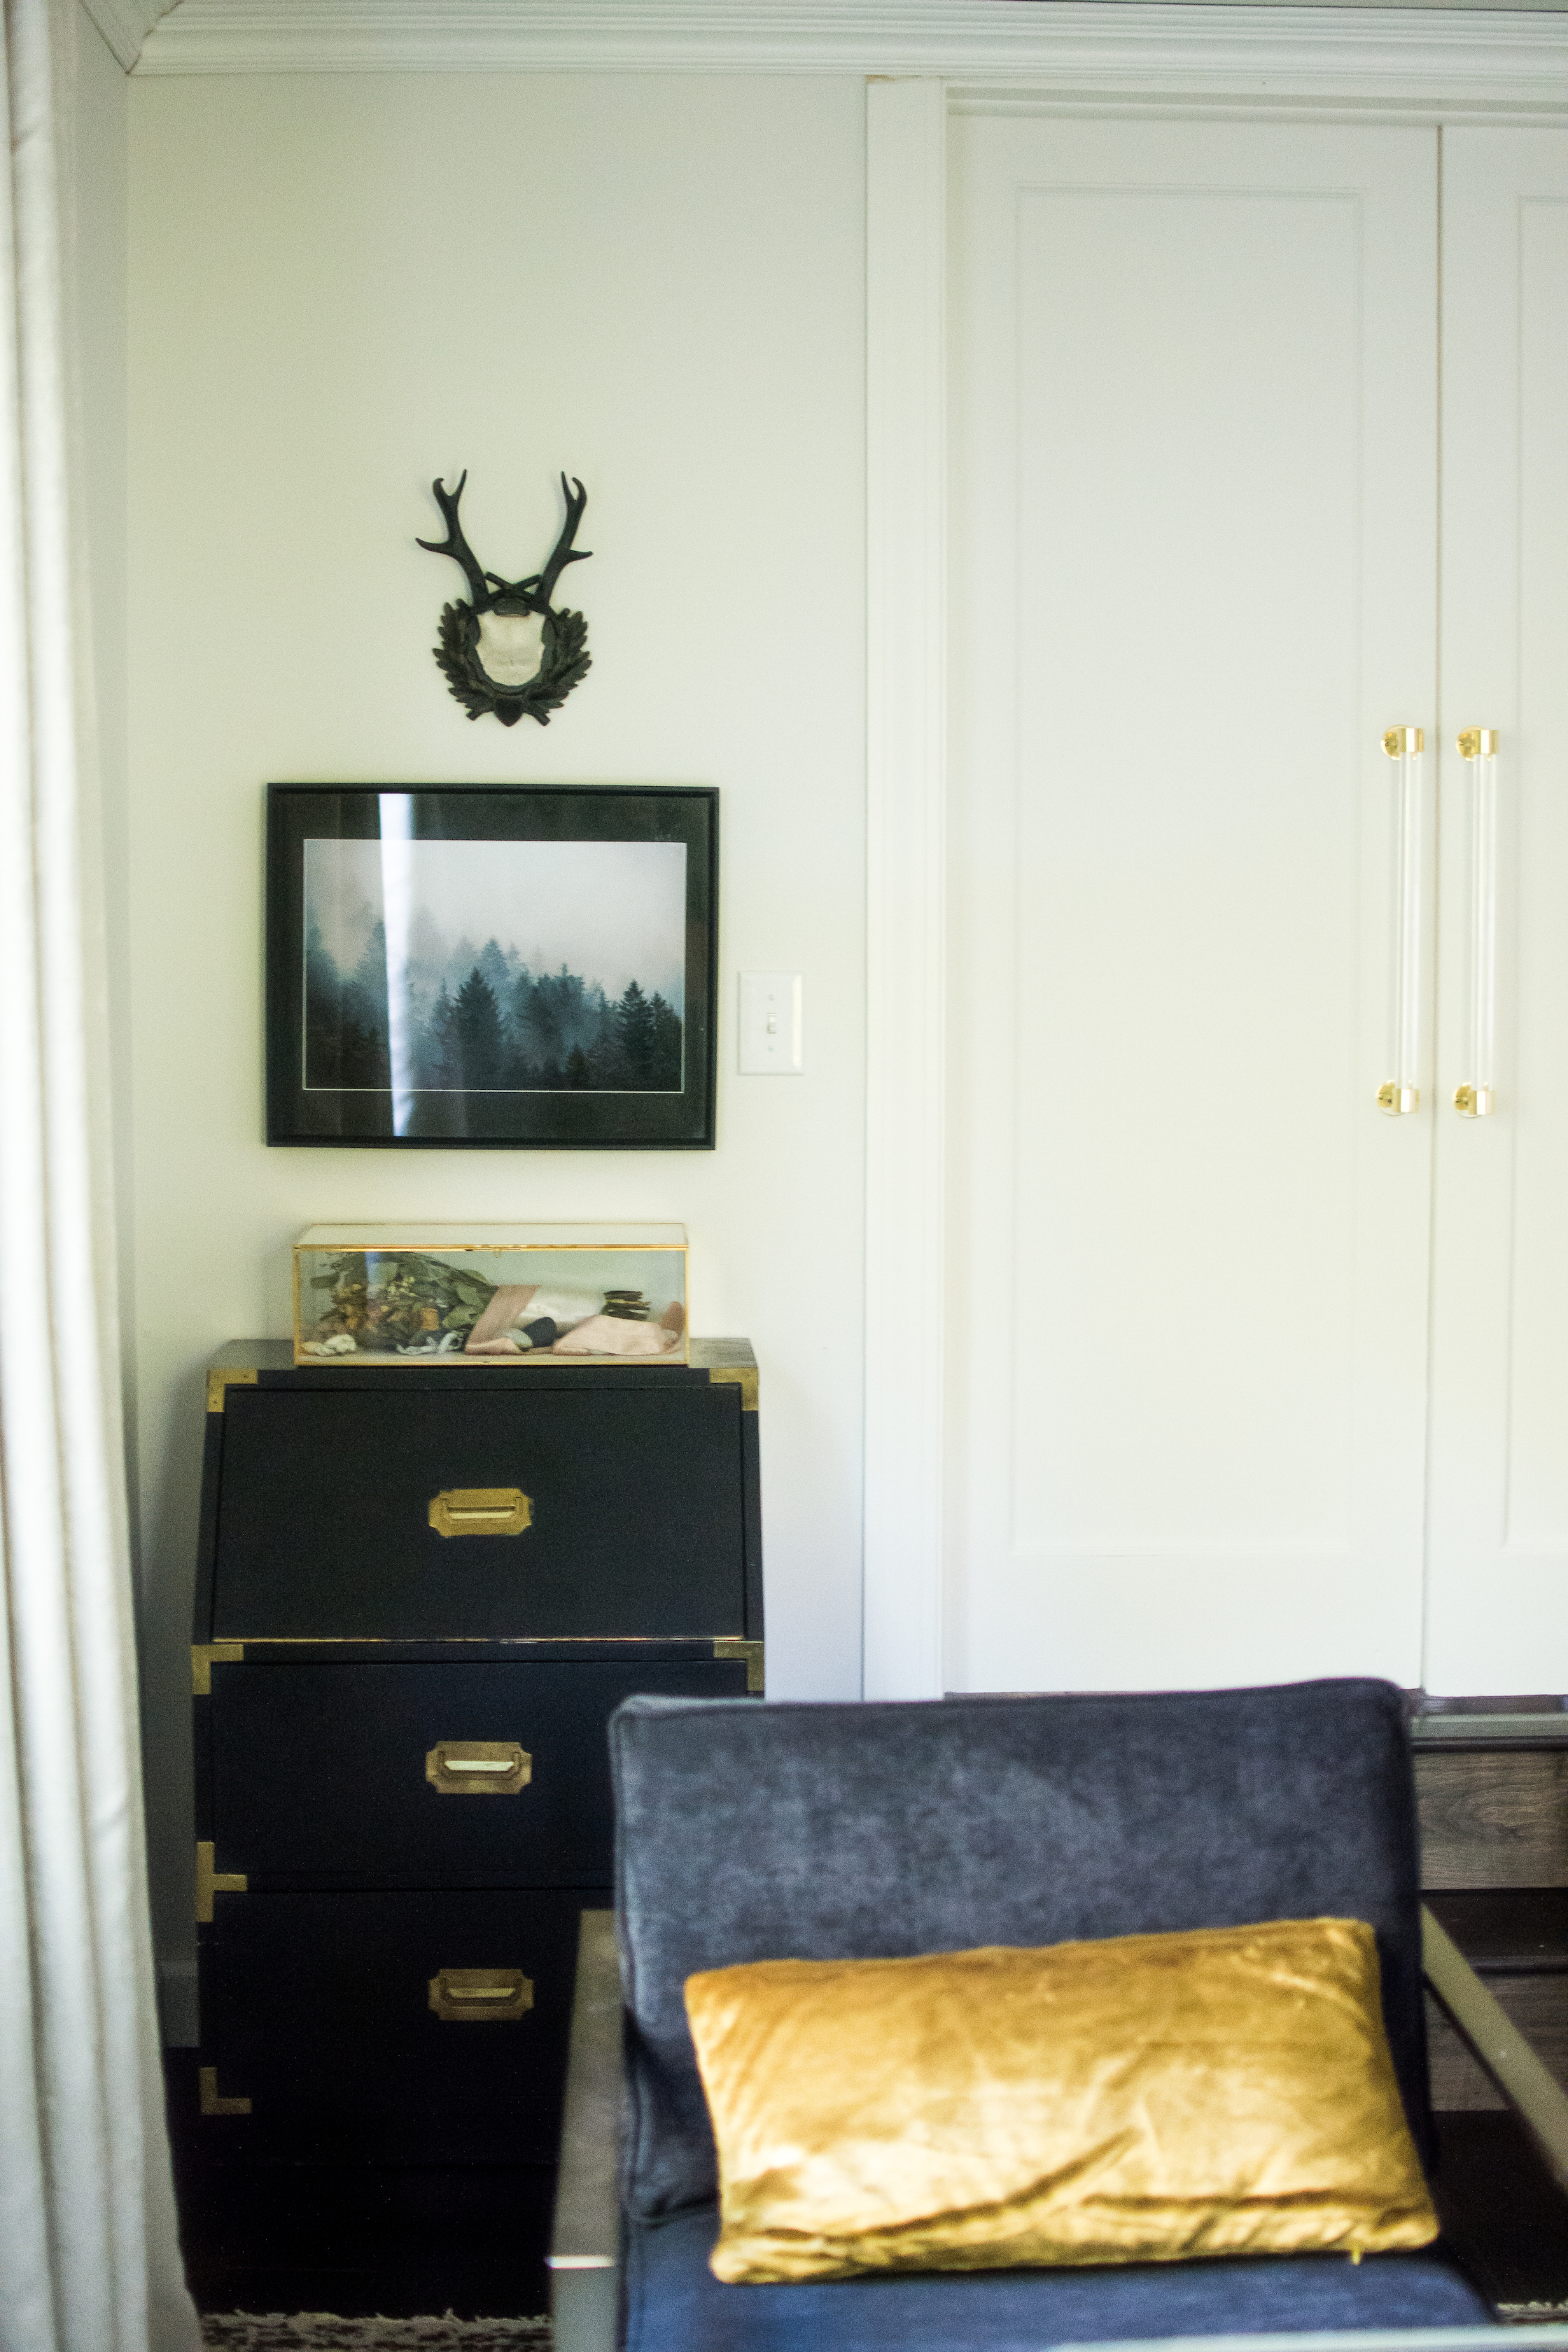
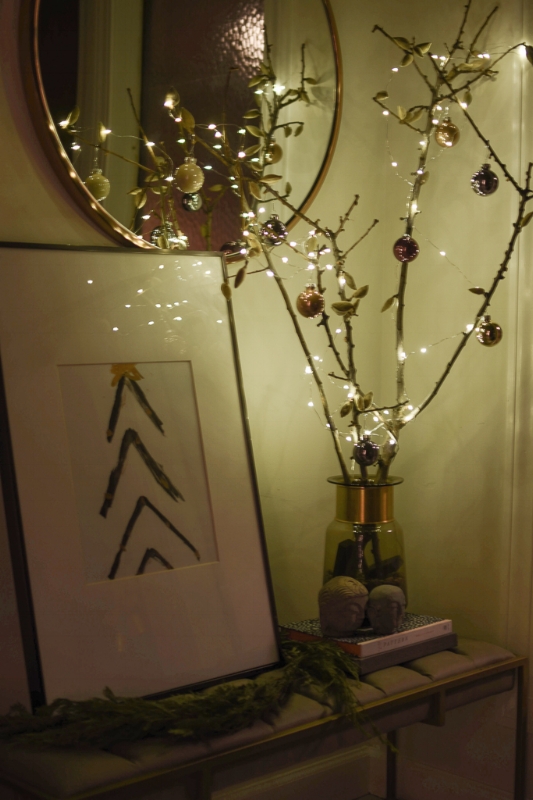
Our entryway is not yet complete, but I still wanted to add some Christmas cheer for our guests to see when they walk in.  I added lights and ornaments our current entryway decor.  I added some fresh garland and a quick DIY art (yeah yeah, I know it looks like a 5 year old made it).  

DSC_1109.jpg

Now, I am really excited to share the night time tour of our living and dining room.  I am at a 1st grade level with use of my DSLR camera but overall, I am pretty pleased with how these pictures turned out.  I LOVE sitting in our living room with the Christmas lights on, a lit candle, hot tea, and some cheesy Netflix movie.  Have you seen A Christmas Prince? Christmas in the Smokies? A Christmas Kiss? I love me some Lifetime-esque themed holiday movies. 

DSC_1244.jpg
DSC_1240.jpg
DSC_1246.jpg
DSC_1200.jpg
DSC_1196.jpg
DSC_1205.jpg
DSC_1193.jpg

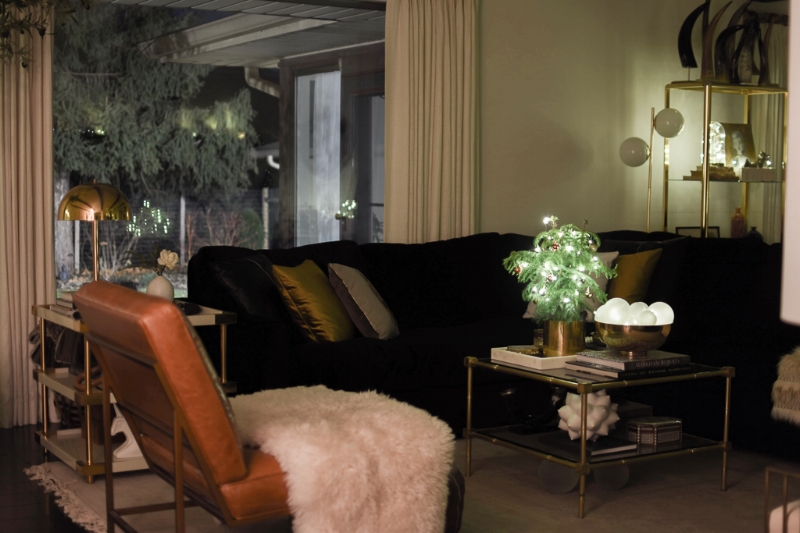
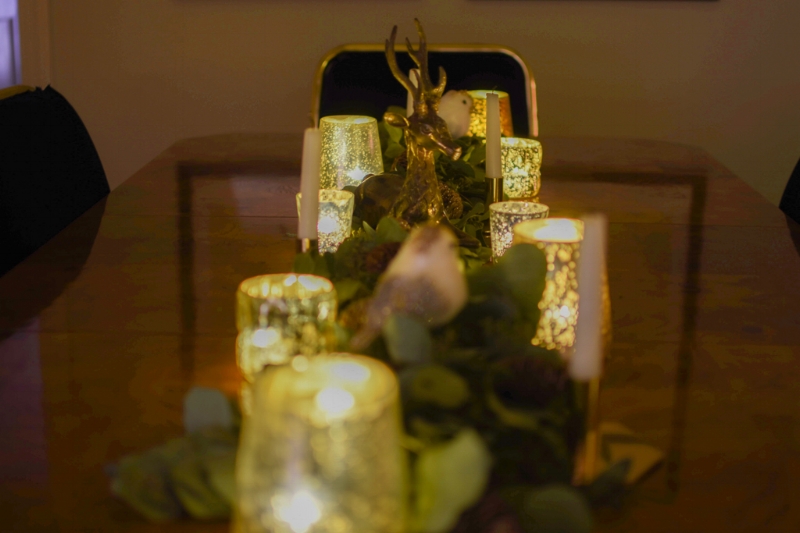
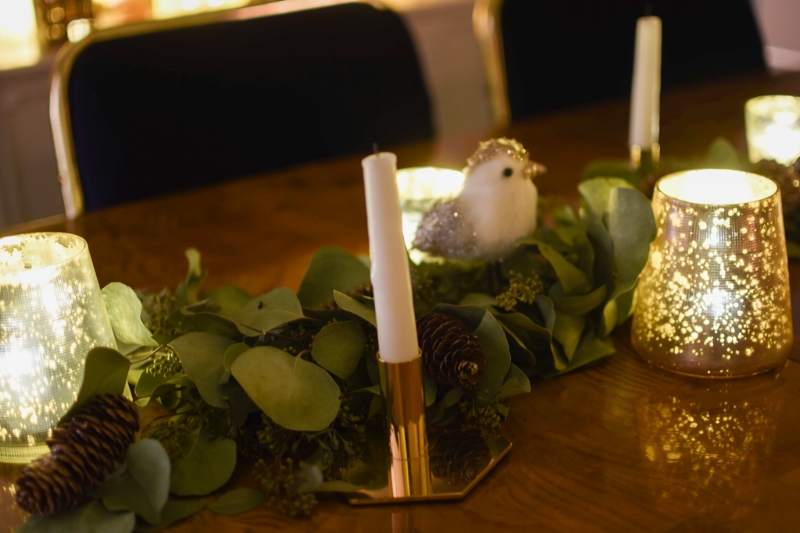
Our dining area glows with the help of these little battery operated tea lights.  They are such a great deal at $10 for 24 lights!

The tea houses are a buy from an after Christmas sale.  However, similar ones can be found at Target here and here.  You can make them your own by painting them and adding details such as gold garland, painted roofs, etc.  The sky is the limit!

DSC_1174.jpg
DSC_1189.jpg

The mercury glass votive holders are from West Elm and World Market.  Both are very budget friendly options and really add a touch of subtle Christmas decor to a space.  

DSC_1178.jpg
DSC_1183.jpg
DSC_1182.jpg

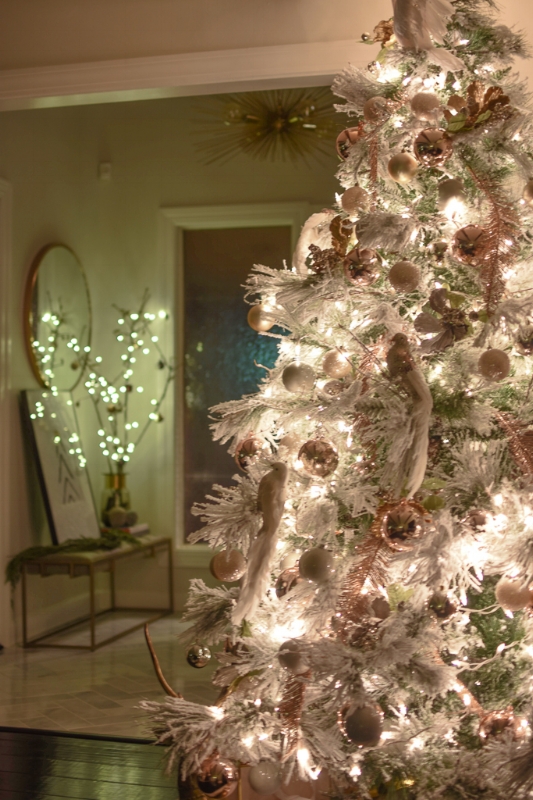
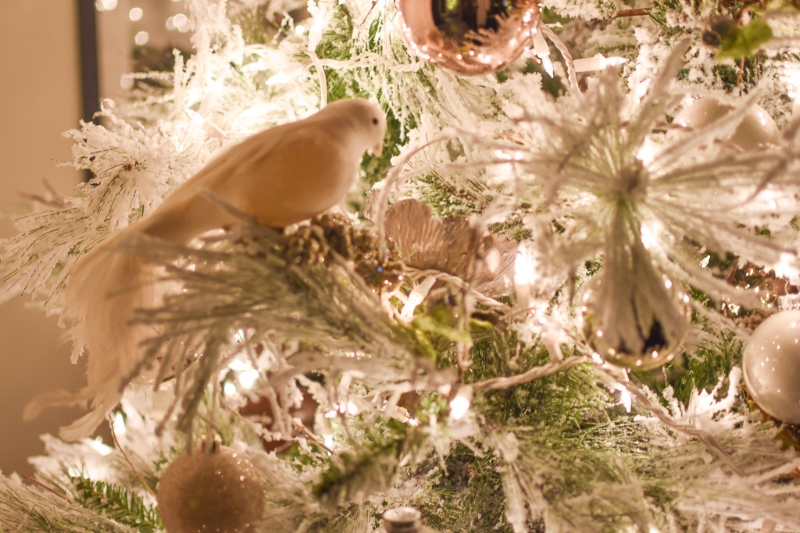
And here our tree glows in all her glory.  She is the heart of the decor and omits the most beautiful warm glow.  The light highlights the flocked goodness of the pine and reflects different colors of lights off the various glass ball ornaments.  

DSC_1212.jpg
DSC_1231.jpg
DSC_1208.jpg
DSC_1221.jpg

Well folks, that brings us to the end of my tour and the week of tours.  No matter what style you love, there are so many ways to bring in holiday decor into your home in a unique and special way.  Hopefully you found some inspiration during the week!  Thanks so much for following along! 

xo

Saher 

Eclectic Home Tour: Welcome to Our Wooded Winter Wonderland

Merry *early* Christmas!  I am so excited to have been invited by Jess from Domicile 37  to join her Christmas 2017 Eclectic Home Tour!  If you are visiting from her page or any of the other participating designers, welcome to House Haus Home!

DSC_1093.jpg

When I was first invited to join the tour, I thought, "Am I eclectic?"  

Webster's Definition:

eclectic

adjective   eclec·tic   \  i-ˈklek-tik ,  e- \'

Definition of eclectic

1: composed of elements drawn from various sources;  

2: selecting what appears to be best in various doctrines, methods, or styles


Well, ladies and gentlemen, it appears that I am!

Now onto our tour!

Sticking to my neutral palette, I found myself drawn to bringing nature into our home this year.  Our tree is a 7 foot flocked tree decorated with a mixture of blush, gold, silver, white, and glittery champagne ornaments.  The lights throughout the tree are a warm white. 

In addition to the basic ball ornaments, I added faux birds, flowers, and feathers to give the tree a glamorous, but natured inspired look.  

Our tree skirt white faux fur and brings a lush look of a blanket of snow as the base of our tree and presents.  The large brass deer is vintage and is finding himself a home under the flocked goodness this holiday season.

DSC_1076.jpg
DSC_1071.jpg
DSC_1075.jpg
DSC_1070.jpg
DSC_1073.jpg
DSC_1072.jpg

Overall, our holiday decor is pretty simple this year.  Our mantle is dressed with fresh cedar garland, mercury candle holders from West Elm, and a couple more vintage brass deer (I own a family of 6) as the main focal point.  

The bells are from Target from last season and the letter ornaments are from West Elm, but from a couple of seasons ago.  Our stockings are faux fur and are a mix of black, gray, and snow white.  I purchased mine from Home Goods years back but I have seen them every year since.  

The garland has small battery operated LED lights throughout and the glow that the various light sources bring to the room in the evening is magica

DSC_1056.jpg
DSC_1050.jpg
DSC_1082.jpg
DSC_1060.jpg

Moving into the dining room, the theme continues.  A beautiful eucalyptus garland with a mixture of candles, acorns, birds, and another member of the vintage deer family find themselves at home.  

The garland was made by Allyson, the owner of Willow and Star Flowers, here in Indianapolis.  I purchased the garland for Thanksgiving and at that time it had the most beautiful scent.  As the garland has dried, it still provides the green from nature and has lasted throughout the holidays.

DSC_1032.jpg
DSC_1031.jpg

Behind the dining table, I have put together our little tea house village.  These light up and are a mixture of matte white, bronze, and touches of gold.  This color extends into the bottlebrush trees which are finds from Home Goods and Target.

DSC_1038.jpg
DSC_1037.jpg

The preserved boxwood wreath has a touch of buffalo plaid and is hung on my favorite Anthropologie mirror  (FYI-wait for a sale, the coupon code will apply!)

Our coffee table had a quick switch-a-roo of two items.  The mini Norfolk pine is from IKEA and has been decorated with mini ornaments and the same LED lights as previously mentioned.  

I DIY'd several items this year as I did not want to spend too much on holiday decor (Actually, most of the stuff was already owned)!  The brass bowl in the centerpiece is filled with two sizes of frosted glass balls from Hobby Lobby.  I strung the LED lights throughout several of them and the bowl gives off a beautiful glow at night. 

The pillows in the background are a mix  black leather, velvet chartreuse, and this cute Reindeer in smoking jacket.  He has a girlfriend on the other side of the couch. 

DSC_1011.jpg
DSC_1062.jpg
DSC_1058.jpg
DSC_1086.jpg
DSC_1089.jpg

Similar to the coffee table, I only switched out a few items on our bar cart.  I brought in this gold glass Christmas tree, added some garland and lights, and Mr. Monkey is showing he can be a good boy with his angel headband.  I love adding a bit of whimsy to all of my designs.  

DSC_1047.jpg
DSC_1091.jpg
DSC_1053.jpg

 A few touches of Christmas were added to the shelves.  This DiY was super simple and I made it while making an Instastory! The branch on the inside comes from our own yard, the brass dome is from IKEA, the clear 4" ornament is from Hobby Lobby and my ole faithful lights are strung inside.  

DSC_1042.jpg
DSC_1044.jpg

There are few other touches of Christmas sprinkled throughout the living room.  The opposite brass shelf has a little gold tree and the side table has some more fresh eucalyptus.  

DSC_1009.jpg
DSC_1024.jpg
DSC_1095.jpg

Well, that is it for now!  Stay tuned for Part II of my Holiday Tour next week when I will be hosting #5stylesofchristmas.

DIY-Upolstered Box

I know what you are thinking.  Yes, I am blogging about a box.  This is the easiest, but most useful, DIY I have ever done.  

About 5 years ago, I was viewing a room tour on a blog.  The coffee table had this beautiful snakeskin box which housed all of their ugly remote controls.  I do not recall where the box was from, but I do remember it had a lot of zeros in the price tag.  Paying that much for a box was not in my budget.  (Similar dreamy box below)


                          via One Kings Lane

                          via One Kings Lane

I spent countless hours searching online for a look-a-like but was unsuccessful in my hunt. 

I decided I would make my own.  I went to my local fabric store and found a remnant of a faux snakeskin for a few dollars.  I picked up a few other items and in a short period of time, I had a budget friendly solution for our coffee table and many years later, it's still in use, holding and hiding all of our remotes, matches, and other knick knacks!

IMG_4502.JPG
IMG_4502.JPG

Just think about it, you could make ANY style box you wanted. Malachite? Done. Floral? No problem! Leopard print? You got it!  With just a few item and less than an hour, you can make a box of your own.

THINGS YOU WILL NEED:

  • Box.  Pick your size.  I used this one from Amazon.  This was the perfect size to hold remotes and other items. It also has hinges which I like.
  • Hot glue gun/glue or glue of you choice
  • Scissors
  • Fabric of your choice.  Size dependent of the size of box.  I am using a remnant of Designer's Guild-Orangerie. 
  • Felt (optional)
DSC_0630.JPG

STEP ONE:

  • Pick your fabric and cut to size ensuring you have enough fabric to fold over the sides (if your fabric has creases or wrinkles, I would recommend ironing these out before gluing for a cleaner finish.)
  • Glue fabric to base and top and then the sides.


DSC_0632.JPG

STEP TWO:

  • Fold corners as pictured and cut off excess.  I find this gives the corners a cleaner look with less fabric bulking.  
DSC_0634.JPG
DSC_0636.JPG

STEP THREE

  • Glue edges, sides,and clean up all the details with glue.  This will vary for each person and his/her technique for gluing.  


DSC_0639.JPG

Complete all gluing to both the top and bottom of your box.


DSC_0641.JPG

STEP FOUR:

Optional: Line the inside of the box with felt  

As before, glue sections at a time and line the raw sides with felt.  


DSC_0642.JPG
DSC_0645.JPG

Let's quickly add up the total cost:

  • Fabric-remnant I had on hand
  • Felt $0.50 (On sale at Joann's 4/$1.00)
  • Glue-already owned it
  • Scissors-already had these!
  • Box-$14.54

TOTAL: $15.04

That's it guys!  The box is super versatile and can be used to hide your remotes, as a jewelry box, or purely decoratively.  It does take some time for the box to close properly (all that fabric makes it have a itsy bitsy gap).  I would put a book or two on top for a day or so to help it close better.

Since this is my first DIY, I wanted to celebrate by hosting a **GIVEAWAY** of the Orangerie Box pictured above.  Double click the picture on IG + Tag a friend who loves DIY and design and the winner will be chosen at random (shipping included!) 


Happy DIYing! 


xoxo

Saher