2018 Spring Home Tour
When the lovely Jewel of Jeweled Interiors told me about the Spring Home Tour hosted by Monica of Monica Wants It, I was all game. I have been so busy with work and other people's homes, that I have neglected mine!
Well, then life happened and I had an unexpected work trip to Jersey (GTL, baby....people probably don't say that anymore, do they?) and was a victim of the dreaded flu. I had grand plans to complete for the tour BUT it ended up being more of a little refresh! :)
If you are new to House Haus Home, welcome to our home! My name is Saher and I am married (Chris) with four dogs (Chico, Joey, Dash, and, Andie) and a cat (Rex). We are currently renovating a split level Mid Century Modern home in Indianapolis.
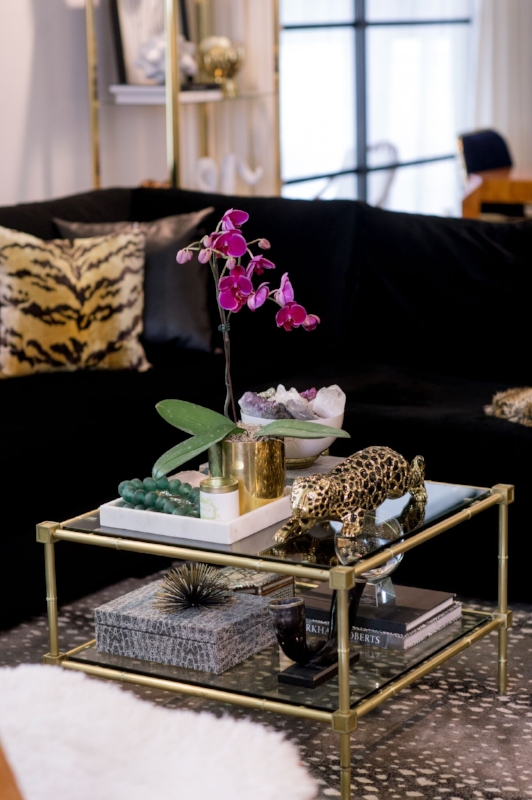
I have not updated my blog or website recently, but here is the last time I photographed the living room to give you an idea of the "before"
When most people hear "spring", I am sure they think of bright and vibrant colors....flowers....butterflies...birds.....and sunshine. What do I think of? Flowers, of course....and textures! As someone who is drawn to neutral spaces (let's be real-color in my home makes me anxious), a spring refresh meant changing out textures such as swapping fur throws and velvet pillows for lighter options such as linen or cotton.
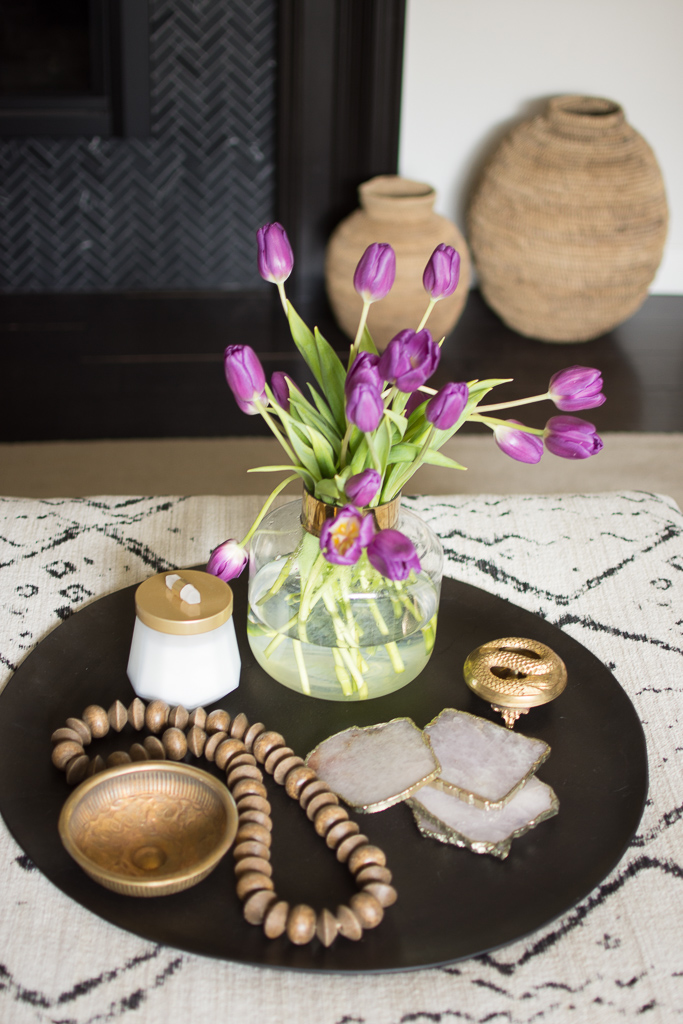
I also wanted the space to feel more relaxed so I swapped out the brass/glass coffee table for this gorgeous black/white ottoman. The ottoman was purchased from my favorite local home store, Shine Design Home. Also, Chico seems pretty relaxed, don't ya think??


The ottoman is topped with this organic black tray from Restoration Hardware and filled with some of my favorite pretties. I love mixing wood into the design in almost every room in our home. The wood beads serves as a touch of nature and a nod to spring.


My favorite little corner had just a few swaps. The vintage brass mushroom lamp was replaced with this gorgeous alabaster orb light. I love how it glows at night and love the depth of the stone during the day. By removing the brass lamp, I feel the room is less "glam" and lighter.
Can we just talk about that peek of the beautiful hand blocked pillows by Ruth and Rhoda. I love the subtle added print against the large black sectional.


Moving around the room, the brass shelf had one small update on the bottom shelf. The large wood chain was moved to the dining area and replaced with this gorgeous wooden carved cobra From JKC Vintage Decor(be sure to check her out on Instagram!).
Bringing in more nature for spring, this little vignette is topped with this sculptural paper mâché bowl and these gorgeous wood balls. I love the organic shape of them!

To the left of the brass shelf is our TV area. Yes, I am interior designer who has a TV in her living room. I told you that I would keep it real! I left it out of the photo so we can focus on these gorgeous branches that I picked up from Trader Joes. They have started to bloom and although I despise the smell (floral scents give me a migraine!) but luckily you can only smell them when you get close.
I am a sucker for branches and will pick them over flowers or a plant any day! I love how the light pink color pairs with the wood bowl and African beads.
As we continue around the room, we are met with some more texture with these natural African gourd baskets. I lucked out by finding the first one during a floor sale at my local RH.

I kept the bar area the same since I pretty much LOVE it as is...that's a pretty big deal for me...two years and no changes (you designer lovers know what I mean? ;) )


I added some of those beautiful branches to the mantel area as well. I wish these branches could look like this all year long! I would actually have some color in my house, if they did! Accompanying the branches are a set of abstract bird vases. Do you see the birdies? I love the curves and matte black finish of them.


The opposite shelf has had a full facelift. Lush feathers with the tribal necklace, cast iron bowls, and this vintage-esq looking pottery fill the shelves on this side of the room.
I had high hopes for a full dining room makeover prior to this tour but unfortunately that is going to have to wait. I have big plans to reupholster the chairs, change out the rug, switch the lamps and maybe even DIY an oak cerused dining table. My love/hate relationship with the Ostriches continues.....
I moved the large chain link to the dining area and added this bright green succulent. It has a topiary shape and several shades of green that scream spring.
So there you have it! My first ever spring tour. I hope you enjoyed viewing our version of Spring! Try and think outside the box and find your style. It does not have to be a literal interpretation of a theme, but should be what feels right to you!
Head over to Cassie's tour and check out her amazing home! Thanks for stopping by!